Featured Posts

Watch Me on Your iPod In another cool thing that happened to me recently, you can now watch some of the videos I recorded on your iPod. I think all of them should be available at some point, but they just started with some...

Read more

Googling "Typical Dinner" I analyze my logs every once in a while to see who visits my different blogs, and I was surprised when someone found my site googling the term "typical dinner." I was more surprised when I googled this...

Read more

High Roast Chicken I had never actually done one of the most basic cooking skills: roasting a chicken. Rather than go with the normal roasting method, I looked through one of my favorite recipes and decided to try a high...

Read more

Southern Food: Boiler Peanuts and Fried Okra Boiled peanuts have recently been promoted to South Carolina's official snack food. More importantly, it's a snack food I really love, and a few weeks ago, when I was at a farmer's market, I decided to...

Read more

Looks Ma, I'm famous Ok, so I'm not that famous, but I did have the pleasure of getting video taped. It was a real life studio: green room, cameras and lights in my face, and a crew of people helping with the shoot. All...

Read more

  • Prev
  • Next

Dosa

Category : dosa, san francisco restaurants, south indian food

So when I normally get Indian food, it means North Indian cuisine. Every once in a while, I’ll venture over to the South, and it’s usually good, but nothing too impressive. However, I went to a place in San Francisco called Dosa (around 21st and Valencia), and I can say it was one of the best meals I’ve had in SF.

We tried a few things, but the two things that stick out to me (and I’ll be going back for more) are the bhel puri and the pani puri.

Pani puri’s essentially a fried hollow crisp that you put some fillings inside of and then you put some tamarin sauce and then some green, watery hot sauce (yeah, I don’t actually remember what it’s all called). Here’s a similar pic:


All I can say is that the sauces were amazing. I don’t use this phrase often, but it was definitely a “party in my mouth”

The other oh-so delicious dish was bhel puri. It’s essentially just fried crisp, diced green mango, potatoes, tomatoes, onions & coriander. Again, quite good.

So this place has definitely moved up to the tops in my list. Pani puri also has risen as a favorite food of mine.

New Phone

Category : iphone

One of the more exciting things to happen to me recently was that we shipped Flex 3, the product I work on. When we shipped Flex 2 last year, the shipping gift was a nice Timbuktu bag. Since that time, Flex has become a baller product and a cornerstone of the platform that Adobe is pushing, so our shipping gift this year was also improved.

I don’t really consider myself that geeky or high up on the technology curve. Yes, I do read computer books in my leisure time, and I do think about programming and software engineering a lot, but I’m not really a big sci-fi person or a bit gadget person. However, the usefulness of an iPhone cannot be denied, and it was honestly one of the few things that I really wanted. However, too cheap to buy it (especially given my Verizon contract), I was really ecstatic when we were given iPhones as our shipping gift.

So far, I have to say the iPhone is extremely useful, and it was an awesome shipping gift. I still have my old number since it’s only $10 a month to add myself to my parent’s family plan, but I’ll be slowly transitioning over to my new phone, so please start to use this one.

Cashew Nut Chicken

Category : cashew nut chicken, chinese food, thai food

One of my favorite places to eat in Pittsburgh is Bankok Balcony in Squirrel Hill. Perhaps the main reason I love it so much is because their cashew nut chicken is so damned good. I haven’t figured out what makes their sauce so damned good, but it’s something I’ve always wanted to try to make. So here’s my first attempt:


We almost always have some frozen chicken from Costco in our freezer. It’s the simplest thing to work with since it’s already in packet form. Just take it out the night before and put it in the fridge.


Cubed into about 1/2 inch pieces.

The veggies I decided to put in are onions and a red bell pepper.

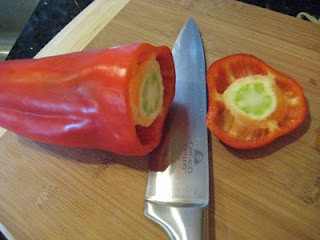
Just chop off the top and then take out the insides.

Now we can start slicing it into smaller pieces.


Repeat with the onion.


For the sauce, we also need some diced garlic. I took one big clove out.


We’re actually going to have two sauces. One to marinate and cook the chicken in, and another to cook everything in at the end.

For the chicken, here are the main ingredients.


We only need the egg white. If you haven’t split an egg into the yolk and white part before, it’s pretty easy. Just crack it open and transfer the yolk back and forth between the two halves.


With our sauce and that minced garlic from before.


After mixing.


We then let the chicken marinate in it while we prepare the other sauce.


For this sauce, we start with sesame oil, corn starch, chicken broth, rice vinegar (ok, I didn’t have any…), and chili-garlic sauce.


I put a little less chili garlic paste, since I didn’t want it to be too spicy, atleast initially.


Taking some vegetable oil, we cook the veggies for about 5 minutes, until the onions are translucent.


Now it’s time for the chicken. Just pout it in with the sauce and cook for about 6 minutes.


Add the veggies back in.


Pour on the sauce. I thought it was a little too spicy, so I decided to mellow it out with some OJ.


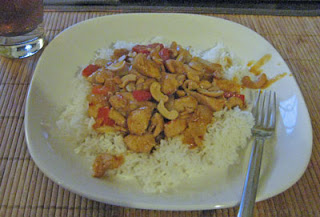
Et voila.


I poured it over some rice and sprinkled some cashew nuts on top.


Overall it was a good stir-fry. It definitely wasn’t the sauce from Bangkok Balcony but still tasty none-the-less. This will be a dish I will try to make again. Since I made the sauce myself (with a little bottled help), I know what went into it. I’ll have to figure out the right combination of ingredients to match the Pittsburgh treat.

BBQ Throwdown

Category : barbeque, southern food

When I go home to South Carolina, there are a few places I’ll probably eat at, but there’s only one place I must eat at–Duke’s Barbeque. It’s Southern food at it’s best.

In the spirit of Bobby Flay, I had a bbq (pulled pork) throwdown with another Adobe employee, Joann, who’s from Texas. We went to split a Boston Butt (Pork Shoulder) from Costco, got our respective sauces flown in from our states, and went to cooking.

I just put mine in a Crockpot overnight for about 10 hours on low with a little bit of water. In the morning I took it out.


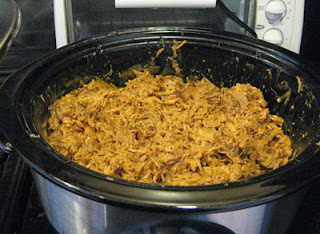
I then shredded it up and put it back in the crockpot.


And the piece da resistance.


I just poured some sauce in and let it all simmer for another 2 or 3 hours on low in the crockpot.

During the “throwdown” we took an informal vote, and it came out about 50/50. It’s hard to beat the real-deal from South Carolina. This one was a tad too moist in my opinion, and that came from cooking it in the crockpot versus a smoker or even the oven. However, I have to say the bbq definitely hit the spot, and I had a great time at the party.

Bobo’s Steak

Category : san francisco restaurants, steak

I’ve had a lot of steaks in my life. I’ve eaten them at many different places. I’ve gotten it at a few fancy restaurants before, and I’ve nearly always concluded that these steaks are no better than the ones I cook at home. In some cases, I find it even worse (esp. for the money). Before this night, I had concluded the only slab of meal you can’t cook at home that is worth getting in a restaurant is the prime rib, which is really hard to cook well at home (though I plan on trying it at some point).

However, last week, I had a steak at Bobo’s, and I have to say it was the best meal I’ve had in San Francisco. The steak was absolutely amazing. When I dream about what a slab of beef tastes like — this was it.

Boboquivari’s is a fancy steak restaurant in the Marina district in San Francisco. My favorite cut of meat is a Ribeye, but they didn’t have that, so I was stuck deciding between a bone-in New York Strip or a bone-in Filet Mignon. I chose the former, and I’m glad I did. The filet was a little more tender, but the flavor of the new york was out of this world.


So if you like steak and are in SF, summon the courage to splurge a little on a nice steak (this is the jew telling you that, so you know it’s good). We definitely splurged when we went there and ended up spending $90 a person there. You don’t have to spend that much to have a good meal, but there were some other good things we got. The crab, mussel, and shrimp platter we got as an appetizer was filled with butter and garlic and quite tasty. The sides were also pretty good, especially the onion rings. For dessert we had some cones with chocolate mousse in them — another good choice. However, you’re going for the steak, and you won’t regret it.

At any rate, I definitely plan on trying some more steak places in the city, but I will no doubt be making a pilgrimage to Bobo’s every once in a while. I just hope it’ll be half as good as my first time.

My First Attempt at Korean

3

Category : korean food

My concentrated effort to become more asian has spilled over into the kitchen. Unfortunately, I was just as (un)successful in the kitchen as elsewhere.

Because of Inbae (my ex-roommate), Shen, Vicky, and many others in college, Korean has become one of my favorite types of food. I’m still a little picky about what I eat, but in general, I like a lot of their dishes.

When I was in Korea, Inbae’s mom made Dak Jorim, a Korean chicken dish. Ebay’s mom was happy to give me the recipe. Also, a typical Korean side-dish is Jap Chae, which is essentially stir fried vegetables with noodles. I don’t like most Jap Chae I get (Brother’s restaurant in SF is an exception), but I thought if I was making it, I could make it to my tastes.

Anyway, here’s the outcome:


First, I’ll show you how I made the jap chae, and then the dak jorim. Then, I’ll tell you how it turned out (if you can’t guess already). As a disclaimer, remember this is my first time cooking it, and I’m not exactly an expert cook, especially at asian cuisine.

So Jap Chae calls for some fancier mushrooms, so you usually just get them dehydrated and add some water. I got some shitake mushrooms.


I let them soak for a half hour (what the instructions said) in a bowl of room temperature water.


After a half hour, I took them out and put them on a paper towel. I don’t know if it’s shitakes in general or just dehydrated ones, but they really didn’t smell too hot. The texture, after rehydrated, was also a little funny, but the taste wasn’t too bad.


Here are the veggies I’m putting in the jap chae. I decided to put onions, spinach, carrots, mushrooms, green onions, and a bell pepper. I also added some diced garlic and egg as well.
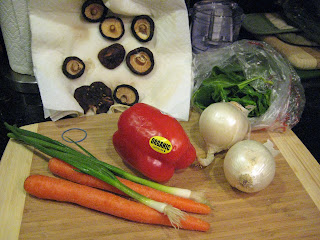

One thing I learned from my sweet cookbook, Best Recipes, which is to use scissors to cut green onions. Actually using scissors when cooking is a pretty Korean thing and can come in quite handy. Note that I didn’t use that cookbook for any of these recipes — I just happened to pick up some helpful hints from it which I’m applying here.


Now for the carrots.


I wanted to make everything look really good, so I decided to julienne cut most of the vegetables. If you don’t know what that is, it looks kinda like a shoestring. There are some great videos online on how to julienne a carrot, and I know I won’t be doing it justice with these photos, but here’s my attempt.

This is what the outcome will look like (it should be a little more uniform, but this was my first attempt):

First, I peeled the carrots. Since I am julienning it and squaring it off anyways, I don’t know if there was a point to this. Next time I probably won’t peel them, but I played it safe this time. I then cut them into a few smaller pieces.


I took each piece and tried to square off the edges. This makes it easier to cut because there’s a flat side, but it’s also part of the julienne process since we want rectangular cuts.


After squaring it off, I cut off some slices and stacked them up.


Then I cut them down again into little shoestrings. After it was all done, here’s what I was left with:


Now for the bell pepper. Since I was on my julienne frenzy, I cut off the top and the bottom.


I opened it up, removed all the stuff from the inside, and cut it into nicer, more uniform slices.


I then just cut it down into slices.


The onions are up next. They’re a little harder to julienne, so I just cut them up into some nice slices.


And here they are…


Mushrooms: into slices as well. They had a little weird texture when cutting, but it worked out fine.


Tada


Here are the majority of veggies for the jap chae.


We also need some diced garlic. Someone complained last time that I didn’t explain all the steps in dicing garlic. Since this isn’t a cooking show (b/c I’m no expert), I just arbitrarily decide what to show you guys. This time, I’ll go into some more detail (though my photos leave a lot to be desired).

I also didn’t know how to chop up garlic when I started and still find it a hassle. Anyways, here’s the garlic:


The key is to take your knife and smash it down against the garlic. This lets you peel the skin right off. Since we’re gonna dice it up anyway, don’t go easy on the garlic and take out some aggression (it makes the skin easier to get rid of).


I usually use two hands when smashing, but one-hand was taking the photo, so this was as good as I could do.


Once you smash it, peel the skin, and then just dice away.


I decided to also add some egg to the jap chae. Since we want to slice it, we want it to be pretty. When I normally make scrambled eggs I shake and stir it around a lot. For this, though, I let them sit for a while to make sure it was flat.

Start with our eggs.


Crack them open.


Then oil the pan a little. I put some vegetable oil in and then used a paper towel to wipe up a lot of the excess. I’m not sure if this is necessary, but I saw someone do it when making tamago (egg used in sushi).


Pour the egg in.


Let it sit until some edges develop.


Once it looks like it’s hardening up a bit, I cut it into smaller slices and moved them away from the center to pour any remaining goop into the center to cook with the rest of the egg.


Then I flipped it all over.


And there we are. Perfect for slicing.


Tada…


Now, for the noodles, I put up some water to boil.


These are my special Korean vermicelli noodles (thanks Joann). They’re made of different stuff then the white people’s vermicelli noodles.


After the water boils, I threw them in.


After about 7 minutes or so, they were ready. I took them out and drained them. However, unlike normal pasta, the directions also say to run cold water on top of them a few times and keep draining them after that (not sure why). At any rate, I put some cold water back in and drained it two times.


The jap chae recipe called for some toasted sesame seeds. I only had sesame seeds. I took about 2 teaspoons of those.


Too lazy to see if this was correct or not, I put them in a pan over low heat and kept shuffling them around. Perhaps you’re supposed to toast them in an oven, but this is what I decided to do. In the end, I wasn’t really sure if it was actually toasted, but it seemed about right :-)


A particularly asian cooking oil is sesame oil, and that’s what this recipe called for.


I put about 2 tablespoons in the pan, heated it up a bit, and then put in the veggies. I left out the spinach and the egg because those can cook a little less.


Let it heat up for a while (about 5 minutes or so)


Add some salt.


And some pepper.


After it’s done, I put some more sesame oil in (another 2 tablespoons).


Then I put in the noodles and the vegetables. I tried stirring it all around, but it didn’t really work.

One step I added that was definitely necessary (and I didn’t take a picture of), is I grabbed some scissors and cut the noddles up a bit. This made it a lot easier to stir and mix the veggies in with.


I also added the egg and some salt and pepper.


After a few minutes I put the veggies back in and then added some soy sauce. Since I like soy sauce (and usually not jap chae), I added a bit extra then the called for 1.5 tablespoons.

Now for our “toasted” sesame seeds.


And voila we are done. Personally i think it looks damned good.


Now for the chicken. I always use costco chicken because it’s the easiest thing. I just go buy some packs from them. Then I just put the individual packs (which still have quite a lot in each one) and freeze them. Each of these packs contains 5 drumsticks that I had taken out a day or two before to let thaw in the refrigerator.


Here they are. I decided I would try taking the skin off some and leaving it on others to see if it made a difference. In the end I actually forgot about this so didn’t run a taste test.


It seems weird to boil chicken, but that’s what the recipe calls for, so I took out a pot and filled it with water.


Let it boil…


Now, in this step, I was supposed to start sticking the chicken in there, but it was at this point I realized my pot was too small. So I had to get a bigger one out and start the process over.

Pot #2:


Here we are…


Chicken goes in.


Let it boil. I’m told the point of this is to let it cook a bit and to remove some of the fat and gunk the chicken has.


As you can see, there’s some nasty stuff on top. This was after about 10 minutes.


I took the chicken out and drained the water.


The sauce is made of garlic and soy sauce. You can also add some red pepper powder (which is what I did). First dice up the garlic — same way as for the jap chae.


Here’s our soy sauce (same as used in jap chae)


The recipe called for 8 tablespoons. Since I had a big pot, I decided to use about 12. Then I put the garlic in as well


Then some red pepper paste (as much as I feel like). Perhaps I’ll try more next time.


And here we are.


Chicken goes in.


Then we fill it with water until the chicken is covered.


We also add 2 tablespoons of sugar.
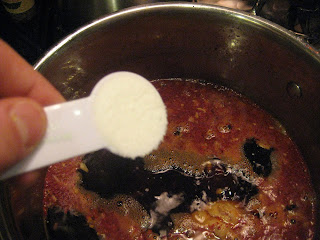

Since we’re trying to boil this water out, I think next time using less water (much less) is advised. I ended up spooning some of this delicious (or what should be delicious) sauce out of there so the chicken wouldn’t end up overcooked.

Here it is boiling some.


I checked the chicken with my oh-so-handy thermometer to make sure it’s cooked, and at 182, it definitely is.


Now that we’re done, to thicken the sauce, we’ll add some corn starch.


I took the corn starch and added it into the pot. I wasn’t sure of the best way to add it in, so I just threw it on top and tried to stir/slosh it around to mix it in.


Here’s what we end up with. It’s a little clumpy (some of it’s chicken pieces and some of it’s clumps of corn starch).


After some more mixing and some more red pepper powder, we get this, which doesn’t look half bad.


And here’s the final plating:


So cooking Korean food was definitely an adventure. Personally, I didn’t really like either of the dishes. The chicken was a little bland, and the jap chae just didn’t taste good to me. But I normally don’t like jap chae, so go figure. Other people who ate the food didn’t seem as picky as me, though. Regardless, I still think the jap chae *looks* amazing, and that’s gotta count for something…

Hopefully my next korean attempt will go better. If you’ve got suggestions/ways I can improve, lemme know.

Hearty Beef Stew

Category : beef stew, crockpot

I just got my crockpot this month. So I figured I would try making one of the easiest dishes: beef stew.


The main ingredient: chuck roast (about 3 lb’s):

Cut into small pieces, large pieces of fat removed:

Pat it dry a little bit (not sure why, but that’s what the recipe said…)


With a little salt and pepper:

Now we’re going to brown the meat a little bit before putting it in the crock pot.


We just need it a little brown. I’m not sure if this is really necessary. Next time I might just try throwing it into the crockpot.


This is good enough.

Now onions. If you haven’t figured out, two of my favorite ingredients are onions and garlic.

Chop of the top and bottom first.

Diced into relatively large pieces.

With a little more vegetable oil, we brown the onions in the same pot the beef was browned in.


Now for some garlic.


After the onions are browned a little (like 6 minutes), we throw in the garlic for about 30 seconds.


Then we add 3 tablespoons of flour to make it thicker.

Then slowly add 2 cups of chicken broth.


We also were supposed to throw in a cup of red wine. Unfortunately, I didn’t have red wine on hand. Since I didn’t want to get rid of the wine, I added some white wine we had and some beef broth and Worcestershire sauce to give it a little more flavor.


Need to stir and make sure to scrape the bottom of the pan to get all those good bits of extra beef.


Then add two bay leaves (I added 3 since one was small). There’s a difference between dried bay leaves and fresh ones. I think 1 dried bay leaf equals 2 fresh ones. We also throw in one tablespoon of dried thyme.


Now throw it into the crockpot.


Four red potatoes.


Peeled and cut up into smaller chunks.


Now for the carrots. It was a little intimidating using real carrots b/c I’ve never used them, and I think my mom’s always used baby carrots.


Gotta peel them first (was pretty easy).

And then chopping them up — again not hard at all.


The recipe didn’t really call for celery, but I figured why not.


Chopped up.


The recipe also didn’t call for canned tomatoes, but I really like stews this way. In fact next time, I’m going to add more than one can.


And in to the crockpot everything goes.

After a few stirs:

I set it for 5 hours on high. If I had more time, I would’ve done 10 hours on low, but I didn’t. I actually came home at lunch time and made the meal. In all it took about 1:30 minutes to get all the stuff ready (with pictures taken, of course) and into the crockpot.


And here is how I left the kitchen after lunch. It’s actually quite messy, and it’s a good thing I came home and cleaned it up before Satyan got back.

Anyways, turn the clock 5 hours later, the kitchen is cleaned, and out comes beef stew.


With rice, here’s what it looks like.


So overall I was pretty pleased with the dish. I have plenty left in my freezer, and it’s quite easy to defrost and reheat. I thought the beef was a little dry (still very tender), which is weird since it was cooked in so much juice and in a crockpot. Maybe I should try preparing it earlier and using low heat? Also, i think I’m going to add more of a tomato base, rather than chicken stock/wine.

Valentine’s Day 2008

Category : pillow fight, valentine's day

Even though this will primarily be a blog about my poor cooking skills, this will also be my personal blog. I probably won’t post much here — only when I do exciting things and want to look cool :-)

Anyways, Valentine’s day has come and past. For a single in the city, it wasn’t too bad.

The only card I got was this one:

And open inside:


And if you don’t know, it’s from my dog, who still loves me…

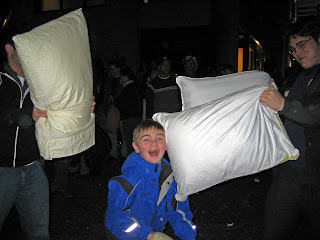
We also went to a huge pillow fight in San Francisco. The video at the bottom does it the most justice, but here are some pics as well.

Picking up Jean who bought 6 pillows from Ross for us.


People getting ready:

Through the night:

Little kids as well:


Chiedo and Jessica:
The rest of us:


It looks like it’s snowing, but it’s just the feathers:


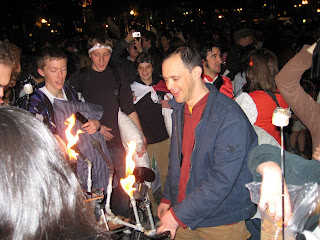
Some guy outfitted his bike to roast marshmallows:


No need for explanation:


And finally the video, which is just awesome. Paul helped edit it a lot:

For Valentine’s day, I was supposed to cook some Korean food on behalf of my Korean lover who’s in Pittsburgh. However, because the pillow fight took so long, I postponed it until the day after. I’ll be posting pics from that dinner soon…

My First Dinner

Category : asparagus, garlic mashed potatoes, mashed potatoes, ribeye, steak

All right, so I’ve cooked before, but this is my first blog post about cooking. I tried the follow the format set in www.thepioneerwomancooks.com, which is an awesome blog. Somehow she was reading my mind and what I wanted for Valentine’s day (besides a girl) and posted the same meal on her blog today, but it’s all good. Mine may not be as good, but I cooked it, so that counts for something.

The meal: ribeye steak, garlic mashed potatoes, and balsamic glazed asparagus.


All right, so let’s start with the steaks. I’m a believer in some form of marinade unless it’s a prime cut of meat, and I usually find Italian dressing works out well, so that’s what I used. However, I just got some of Duke’s BBQ sauce from back home so I mixed that in as well. It’s a sweet, mustard based BBQ sauce,and is something I’ll showcase later on when I make some pulled pork sandwiches. I let them marinade overnight.

Living in the city, it’s hard to make a good steak. I’m used to a grill, but since I’ve been here a while I’ve tried a few different techniques (pan, oven, broiler). From them, I like the broiler the best; however, next time I’m going to give the pan method another try. Anyways, here they are:


And in they go:

After about 8 minutes, they look a little charred, and they’re ready to be flipped. I’ll flip and rotate them around since nothing cooks perfectly even:


After another 8 minutes and using my handy-dandy, brand new thermapen:


So let’s check them out:

All right, so it’s 115 degrees now — not quite ready. I actually learned this isn’t the best way to insert the thermometer — we should going through the side to the center. It’s more accurate that way. After this little lesson, I managed not to overcook or undercook the steaks, flipping and rotating to evenly cook them in the broiler. I cooked them to about 130, and after about 10 minutes of resting, I cut the bad boys open to check ’em out.


All right, now on to the garlic mashed potatoes. So after doing this yesterday and reading the pioneer woman’s rendition, I’ve decided her way is much easier. For one, roasting the garlic looks easier and turned out better and the potatoes are easier to deal with (try peeling hot potatoes while your hungry friends are waiting anxiously…). So from now on, I’ll use her method, but here’s what I did.

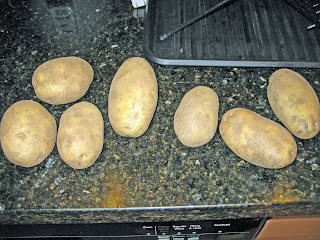
First, the candidate spuds.


All right, so first we get some water, throw those potatoes in there, turn it up high, and let it boil.


When it finally boils, turn it down a bit and wait about 20 minutes or so until the potatoes are tender (stick a fork in it).

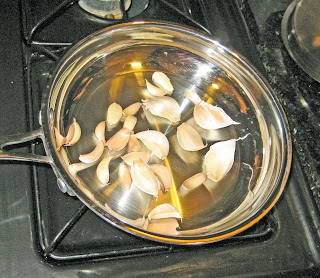
While we’re waiting, let’s roast some garlic. One head of garlic is about right. We’ll use a saute pan to brown it.

Breaking the head apart into the bulbs, we’ll heat it on low heat with the cover on for about 20 minutes, making sure to shake them around a lot so they don’t burn.


About 20 minutes later, they’ve got some brown spots and they’re ready to go.

I let them cool and soften a bit in the pan for about 20 minutes. Then I took them out, peeled them, and cut off the hard ends. As you can see, I burned mine a little. I’ll try roasting garlic in the oven next time…


Our potatoes are done, so take them out, and start peeling with a small knife.

Taking the peeled spuds, I threw them back into the pot.

Throw those mushy, roasted garlic bulbs in there and take out the masher and get to work.

Last time I made these, I didn’t have a masher….much easier this way.

Now, we need to add some butter. One stick is good for the amount of potatoes I took out. To make it easier to add in, let’s melt it first.

Throwing that in there, we’ll work it around a bit


We’re not quite done with the liquid fat. Let’s take some half-and-half.


It works a little easier if you warm up the half-and-half first, so I took about 8 ounces and put it in the microwave. Then, we add it a little bit at a time and mix it into the potatoes. I found out that about 6 ounces was all we needed.


Lastly, a little salt and pepper for flavor. Since it’s garlic mashed potatoes, why not garlic salt.

While you weren’t looking, I also added some chives I had to give them a bit of color.


And there you have it, garlic mashed potatoes. Quite garlicy and tasty too.

Now for the greens. I know some don’t like asparagus, but I do, so I figured I’d give it a try. I figured tonight was cooking with the broiler so that’s how I prepared the asparagus. Let’s meet the bunch.

Grab each piece and just bend until it snaps. This gets rid of the hard, inedible part.


Lining them up on the sheet. I threw on some olive oil and some salt and pepper. Then into the broiler they go for about 8 minutes, flipping them in the middle.

As you can see, I think mine went in a bit too long, but just barely. Anyways, onto our sauce.


Take 3/4 cup of balsamic vinegar.


Put it into a pan over medium-high heat and let it boil.


After about 20 minutes, we get something much thicker. If we try to move it around, you’ll see it sticks together.


Pouring it back out, you’ll see it’s been reduced to about 1/4 cup.

We also want 1/4 cup of olive oil. I decided to add it to the same measuring cup, rather than just drizzle them separately onto the asparagus. They don’t mix very well and it made the drizzling a little harder, but in the end it worked out just fine.

One day, I’ll try to make some homemade rolls. For now, crescents out of the can work just fine (probably better). I did my best to roll them up well:


But in the end it doesn’t really matter :-)

All right, so that’s it. Overall the food was quite good. I thought the steaks were a tad sweet (italian dressing + sweet bbq sauce), so next time I’ll change it up or won’t marinade as long. The mashed potatoes were delicious and the asparagus not too bad for such a green veggie :-)

Hopefully I’ll continue to blog about my food posts. Let me know what you guys think.